While I was a patient on a psychiatric ward, they had a sensory room with different aids, including aromatherapy and a weighted blanket. The blanket was magical (soothing, comforting, a literal safety blanket) so I decided to sew my own. They are also used for children with autism. Do NOT use for babies. Smothering deaths have happened.
FYI, I’m very much a beginner. I’ve made straight curtains, potholders and a small wall-hanging quilt (all straight lines), but that’s about it.
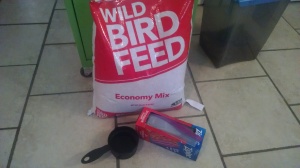
I made this blanket over a weekend, and the total cost was $24.52, but I already had some materials. Your cost will increase if you choose to use real Poly-Fil stuffing beads. I used a bag of economy birdseed from Target because I wasn’t sure how the blanket would come out. I plan to use it at work, an office building with a cafeteria, and I’m going to store it in a mouse-resistant garbage bag there. We’ll see how it goes.
MATERIALS
2 yards muslin or plain cotton fabric
2 yards fabric for cover
1 to 10 pounds of Poly-Fil stuffing beads (or birdseed)
Ziploc baggies, quart size
duct tape
Velcro
thread
pencil or fabric marker
quilter’s or regular ruler
measuring cups
I used muslin, but kind of wish I’d used a slightly thicker fabric. I also used a very soft, studded fabric I found in Joann’s “comfy cozy” section. The nubs are a great sensory detail. My fabric cost: $17.52. I used birdseed, 20-pound bag was $7 at Target; I used 10 pounds of it. Again, if making this for a child, be VERY careful about the weight. Ten pounds is definitely at the top of the range for the size I made (finished = 20 by 30 inches) for an adult. I think 7 pounds would have sufficed. The Velcro I had lying around was 6 by 4 inches, which I cut into 1- by 6-inch strips for the cover closure. I used yellow duct tape, because it was what I had. It shows through the muslin but I’m not worried about it.
STEP BY STEP WITH PHOTOS
1. Fold muslin or plain fabric in half so you have a two-ply layer of 1 yard. Using a ruler and pencil or fabric marker, mark off 7- by 7-inch squares, totaling 12 (4 squares wide by 3 squares high). I should have ironed, I guess, but I didn’t feel like it.
2. Sew lengthwise first, four rows to make the sides of the pockets you’ll stuff. Then sew across one edge to create the bottom of the first row of pockets. I used a zigzag stitch at a length of 1.5 on my machine, and I made sure to backstitch at all the stress points (corners of squares). I used the natural fold as one side of the blanket, but you could use two pieces of muslin and sew all four sides.
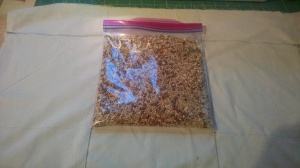
3. Fill a Ziploc baggie with birdseed or Poly-Fil. I used 1.5 cups per baggie (1 bag per pocket), so 12 pockets equaled 10 pounds. Be sure to do the math so you have an even weight in each pocket and end up with your desired weight. Seal the baggie, then add duct tape over seal for extra strength.
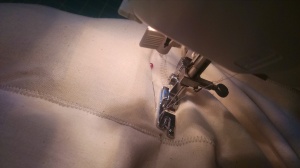
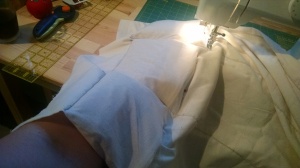
4. Insert 1 bag into each of the 3 long pockets, then pin and sew the horizontal seam, closing the first row of pockets. Be careful not to catch your Ziploc bags with the needle when you sew by pinning carefully. I wouldn’t recommend cheap store-brand bags. I could feel the Ziplocs easily through the muslin. Yeah, it’s a little tricky to sew the horizontal seams to close the pockets. I found resting the bags on my left arm while guiding with my right hand worked the best (photo 3 below, clockwise).
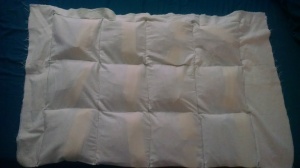
5. Add three more bags (1 each in the 3 long pockets), pin and sew the pockets closed. Repeat until all pockets are filled. I then folded the raw edges over and sewed another seam around the outside (excluding fold) to keep all that birdseed where it should be (photo 2).
6. For the cover (have fun picking out soft fabric that’s fun to touch!), lay out your fabric as you did with the muslin: 2 layers of 1 yard each, stacked (or folded, as I did). After smoothing the blanket and cover fabric flat, place blanket on cover and cut to size, adding 1 inch on one side, 1 inch on the bottom, and 3 inches at the top (this will be the opening of the cover, like a pillowcase).
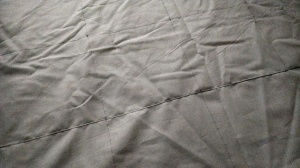
7. Fold your cover so the right sides are facing. You can see the wrong sides of my fabric below: The little divots are the back (wrong sides), the nubs (above) are the front (right sides). Using the fold as one long side, pin around the bottom and other long side, then sew. I used the same size stitch as for the muslin, a short zigzag for strength. I started with a 2 length but decided to go to 1.5 (you can see the difference in photo 2 below). You can coordinate your thread with the cover fabric or use something contrasting. I used light-gray thread on lime-green fabric. Be sure to backstitch over stress points (photo 4 below).
8. Make sure the blanket fits inside before you finish the opening of the cover. With wrong sides still facing out, fold over the raw edges of the opening 1 inch, then fold again (1 inch) so the raw edge is hidden (photo 2 below). The side with the vertical seam is a little tricky. I trimmed the seam and opened it so my machine wouldn’t get jammed with too much fabric (photos 3 and 4 below).
9. The cover should now look like a pillowcase. Now add Velcro for closures. With cover right-sides out, fold one side of the opening down (photo 2 below). I had to cut my Velcro into 1- by 6-inch strips (photo 3). I used self-adhering fabric Velcro, and I highly recommend it. No sewing, no ironing. I was skeptical at first, but from the way it stuck even to my fingers, I trust it now! Be sure to place it exactly where you want it the first time because there’s no moving it once it’s stuck to the fabric. The easiest way to stick it on is to seal the Velcro strips (fuzzy side to flatter side, as they’ll be when the cover is closed), adhere to one side of the opening, remove the top layers’ backing (both at the same time), then fold the other side of the opening back up to it’s final, closed position. Press down to seal the Velcro to the top layer.
DONE!
Final result, with the weighted blanket inside its cozy cover. I’d love to see yours if you decide to make one! Experienced sewing people (because saying sewers sounds so unattractive): Please feel free to tell me if I’m using the wrong terms. I’m still a beginner, but I wanted to share this because it was very easy and very comforting. And this one I found on Amazon is 4.5 pounds, 32- by 38-inches and costs $68.66 at the time of this post. That one isn’t machine washable, and I wanted to be able to throw the cover in the wash when needed. Happy sewing!








How do you keep the inner weighted portion from sliding down into the case and lumping up on the bottom edge.
LikeLike
Hi Catherine, sewing the Ziploc bags into the individual “pockets” in the muslin (the white material in the photos) keeps the bags in place. Thanks for reading!
LikeLike
My mom is an occupational therapist and she uses these a lot at work. She said for weight you want to go 10% of your body weight plus a pound or two. Keep it at just one pound more for kids 🙂 I’m planning on making my kiddo one for his spd.
LikeLiked by 1 person